Cert Admin: Issue Certificates
In this section you act as a Registrar — the training administrator who issues blockchain-backed certificates to students.
Step 1: Log in to TechPulse Course Manager
-
Open the TechPulse Course Manager: Open
-
You will be redirected to Keycloak. Log in with:
Username
admin@techpulse.demoPassword
admin -
After login, you land on the Dashboard showing certificate statistics — total certificates, active count, and revoked count.
|
The Course Manager requires the |
Step 2: View the Dashboard
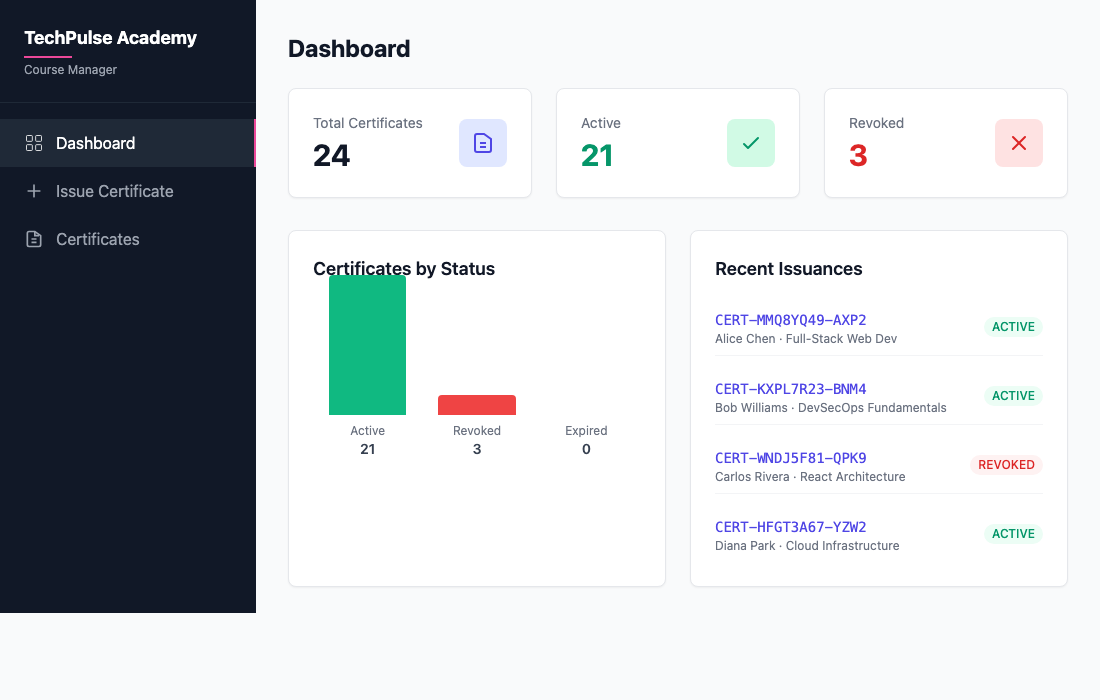
The dashboard shows:
-
Total Certificates — All certificates issued by this organization
-
Active — Certificates in VALID status
-
Revoked — Certificates that have been revoked
-
Certificates by Status — Bar chart showing the distribution
-
Recent Issuances — The latest certificates with their status
Step 3: Issue a Certificate
-
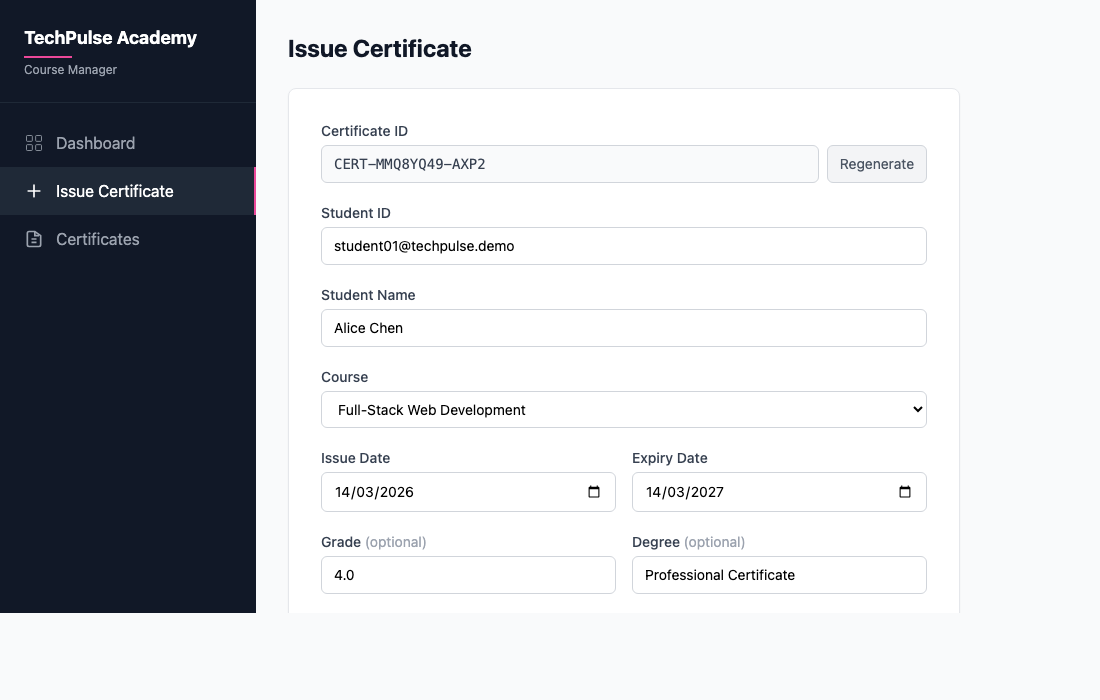
Click Issue Certificate in the left sidebar.
-
The form auto-generates a unique Certificate ID (e.g.,
CERT-MMQ8YQ49-AXP2). Click Regenerate for a new one. -
Fill in the details:
Field Example Value Student ID
student01@techpulse.demoStudent Name
Alice ChenCourse
Select from the dropdown (e.g.,
Full-Stack Web Dev)Issue Date
Today’s date (auto-filled)
Expiry Date
One year from today (auto-filled)
Grade (optional)
4.0Degree (optional)
Professional Certificate -
Click Issue Certificate.
-
On success, you see a confirmation. The certificate is now permanently recorded on the Hyperledger Fabric blockchain.
|
Copy the Certificate ID — you will need it in the next section to verify the certificate as an employer. |
Step 4: View Certificate List
-
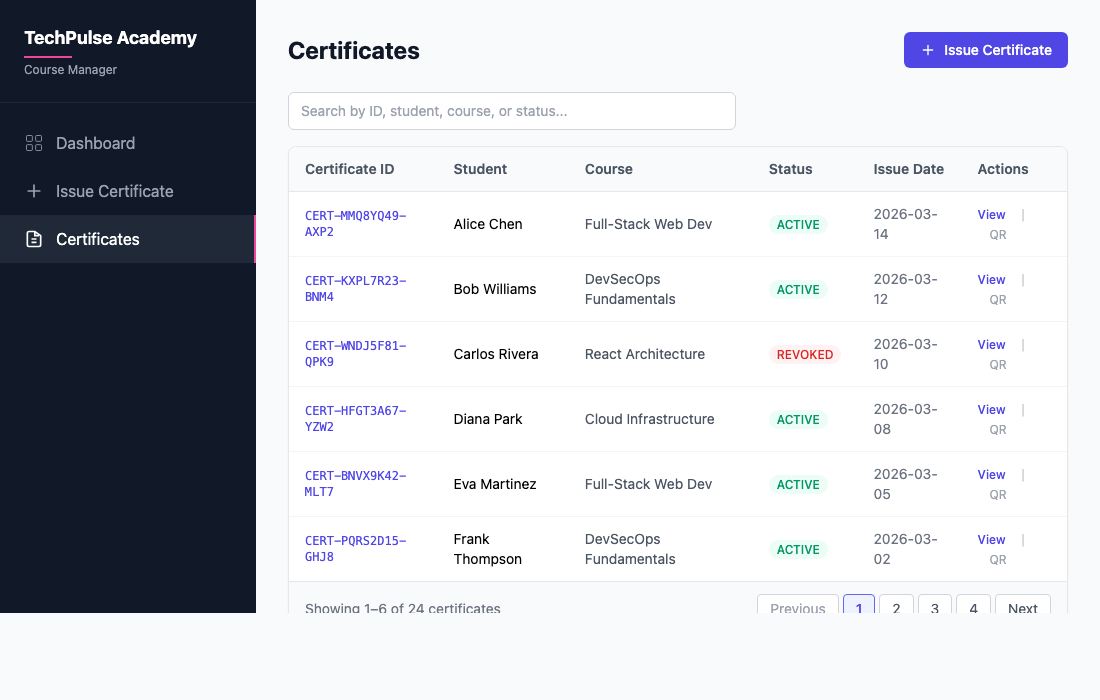
Click Certificates in the left sidebar.
-
You see a table of all certificates issued by TechPulse, with columns for Cert ID, Student, Course, Status, Issue Date, and Actions.
-
Use the search box to filter by ID, student name, course, or status.
-
Each certificate has a View link to see full details and a QR code icon for the verification QR.
Step 5: View Certificate Details
-
Click View on any certificate.
-
The detail page shows all certificate fields including:
-
Certificate ID, Student ID, Student Name
-
Course, Issue Date, Expiry Date
-
Grade and Degree — these are the private fields
-
Organization, Status (ACTIVE or REVOKED)
-
|
As an admin, you see all fields including Grade and Degree. When an employer verifies this same certificate through the public portal, Grade and Degree will be hidden. This is the privacy enforcement in action. |
Step 6: Try Another Organization
Repeat the same flow with DataForge to see how each org operates independently:
-
Open DataForge Course Manager: Open
-
Log in as
admin@dataforge.demo/admin -
Issue a certificate for a DataForge student
Each organization:
-
Has its own Keycloak instance and user directory
-
Runs its own peer node on the Fabric network
-
Can only issue certificates under its own organization name
-
Cannot see or modify certificates from other organizations
This is organizational isolation — a core principle of the multi-org blockchain architecture.